
I’ve been getting more into vision analytics, private, professional, everywhere. My usual approach for solving problems is to learn a tool, understand conceptually what it does, check my back catalog of problems I couldn’t solve and see if that tool or approach helps. Vision analytics is no different.
I’ve also applied this to document classification problems, imagine a thick scanned packet where you need to find specific data elements within specific pages among dozens of irrelevant ones. For the start, we trained a PyTorch model to filter out irrelevant pages in the packet based off how they “looked.” You don’t need to read the fine print to tell a calibration certificate from a cover sheet. I want to hone in on something we did for that project.
A simple example, every ML tutorial skips the annotation step. You get “collect your data” and “train your model” with nothing in between. The in-between is where I’ve spent most of my time on this project. How do we really solve this problem?
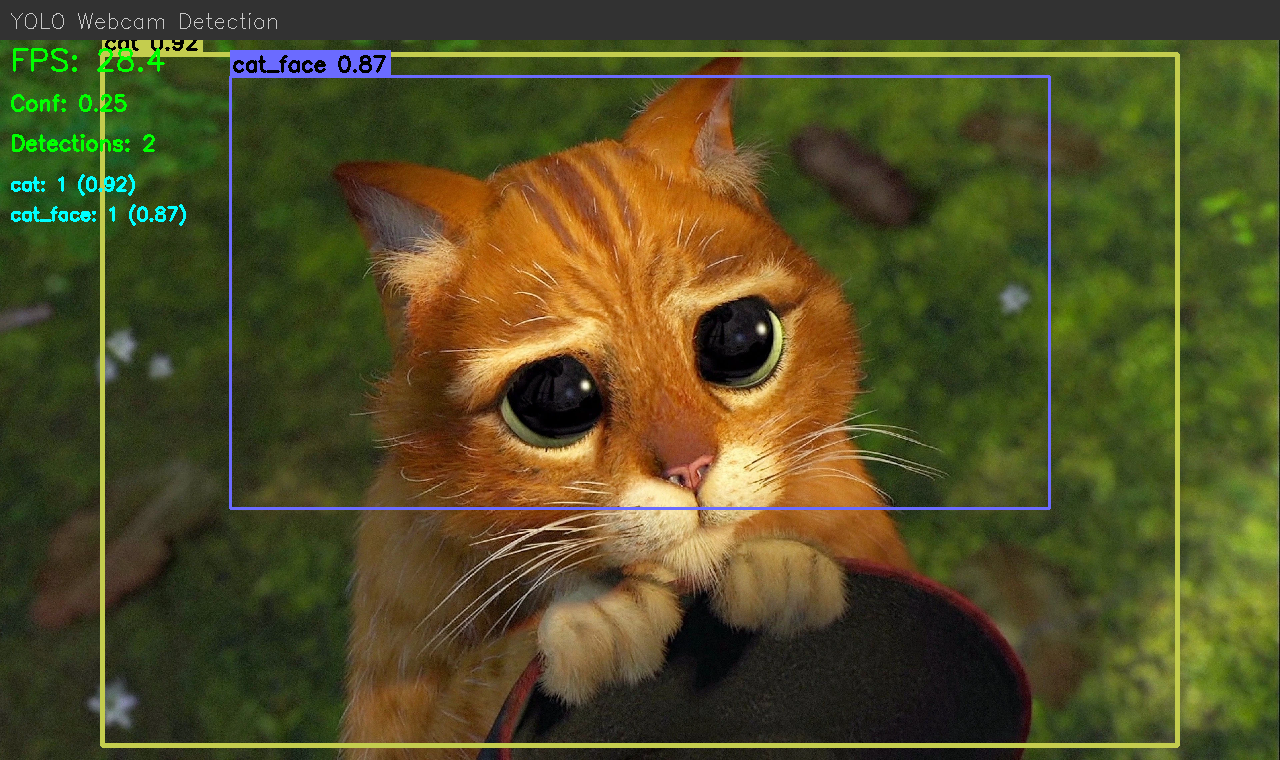
Off the shelf tools I’ve found include LabelImg for bounding box annotation with YOLO export, and Label Studio for more general-purpose labeling including classification. You can also save a bunch of files to a folder and manually drag things over, like I did for my Puss in Boots classifier. Each one of them requires you to learn a system that includes features not relevant for what you’re doing.

For me, I knew the inputs (big folder of images), the outputs (the standard for YOLO and COCO are relatively clear). What was available to me? Touchscreen laptop, ways of interacting that I like, apps that I’ve liked using (e.g. I like bounding boxes you can click on to select, resize on the corners and not the outside of the box, being able to reclass by clicking the class again, …). What design choices work for me in the app are different than other people.
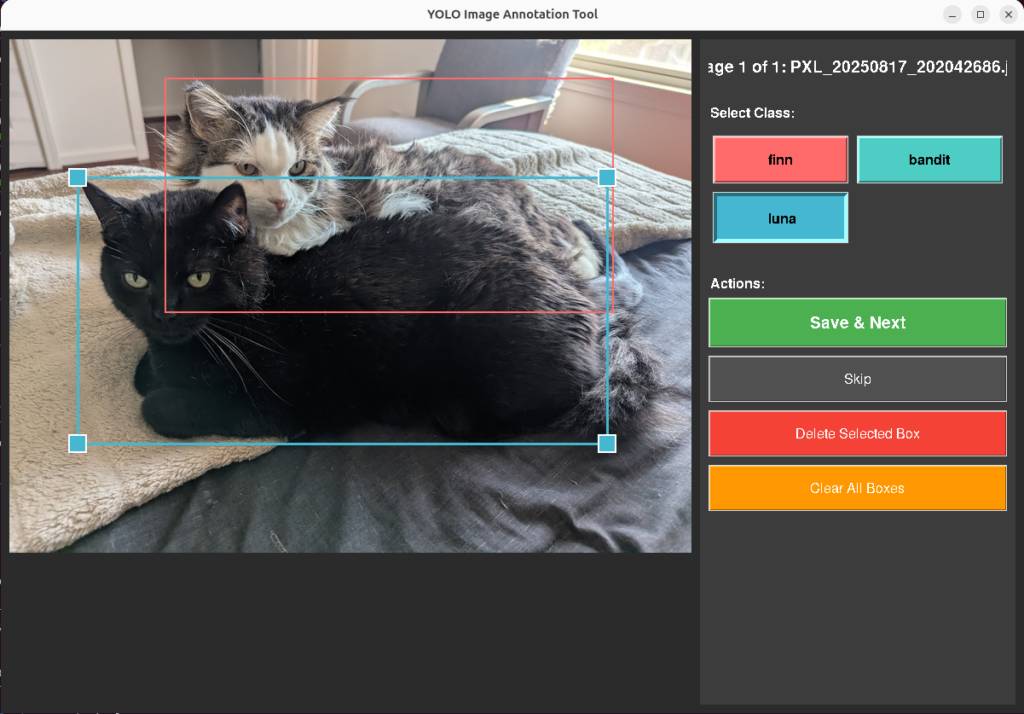
With that, I built two versions of a bounding box annotation tool in tkinter. Both take images from an input directory, let you draw and label rectangles, and save bounding box coordinates in standard formats. The tool uses the touchscreen extensively, and the design choices you can see are all built for making that workflow simple, and simple for my brain.
Each annotation is a set of bounding box coordinates (class, position, size), one file per image. The tool manages file state: images go from data/input/ to data/processed/, annotations save to data/annotations/. An MD5 hash index checks each incoming image against already-processed files to prevent reannotating duplicates.
Design Decisions
These came from annotating about 200 images on a touchscreen tablet.
Touch targets. Default tkinter handle sizes are too small for fingers. I set HANDLE_SIZE to 20 pixels, EDGE_TOLERANCE to 15, BUTTON_HEIGHT to 50. At the original sizes I was missing resize handles about 40% of the time on the touchscreen.
Nested boxes. The cat detector needs both full-body and face annotations, meaning a smaller box inside a larger one. Click detection uses edge proximity: within EDGE_TOLERANCE pixels of an existing box edge means selection. Deeper inside means start drawing a new box. This solved the sub-annotation problem without adding a mode toggle.
Auto-advance. Save and Next moves the image to processed/ and loads the next one. Saves roughly 4 seconds per image. Over 600 images, that’s 40 minutes of file management that the tool handles instead of me.
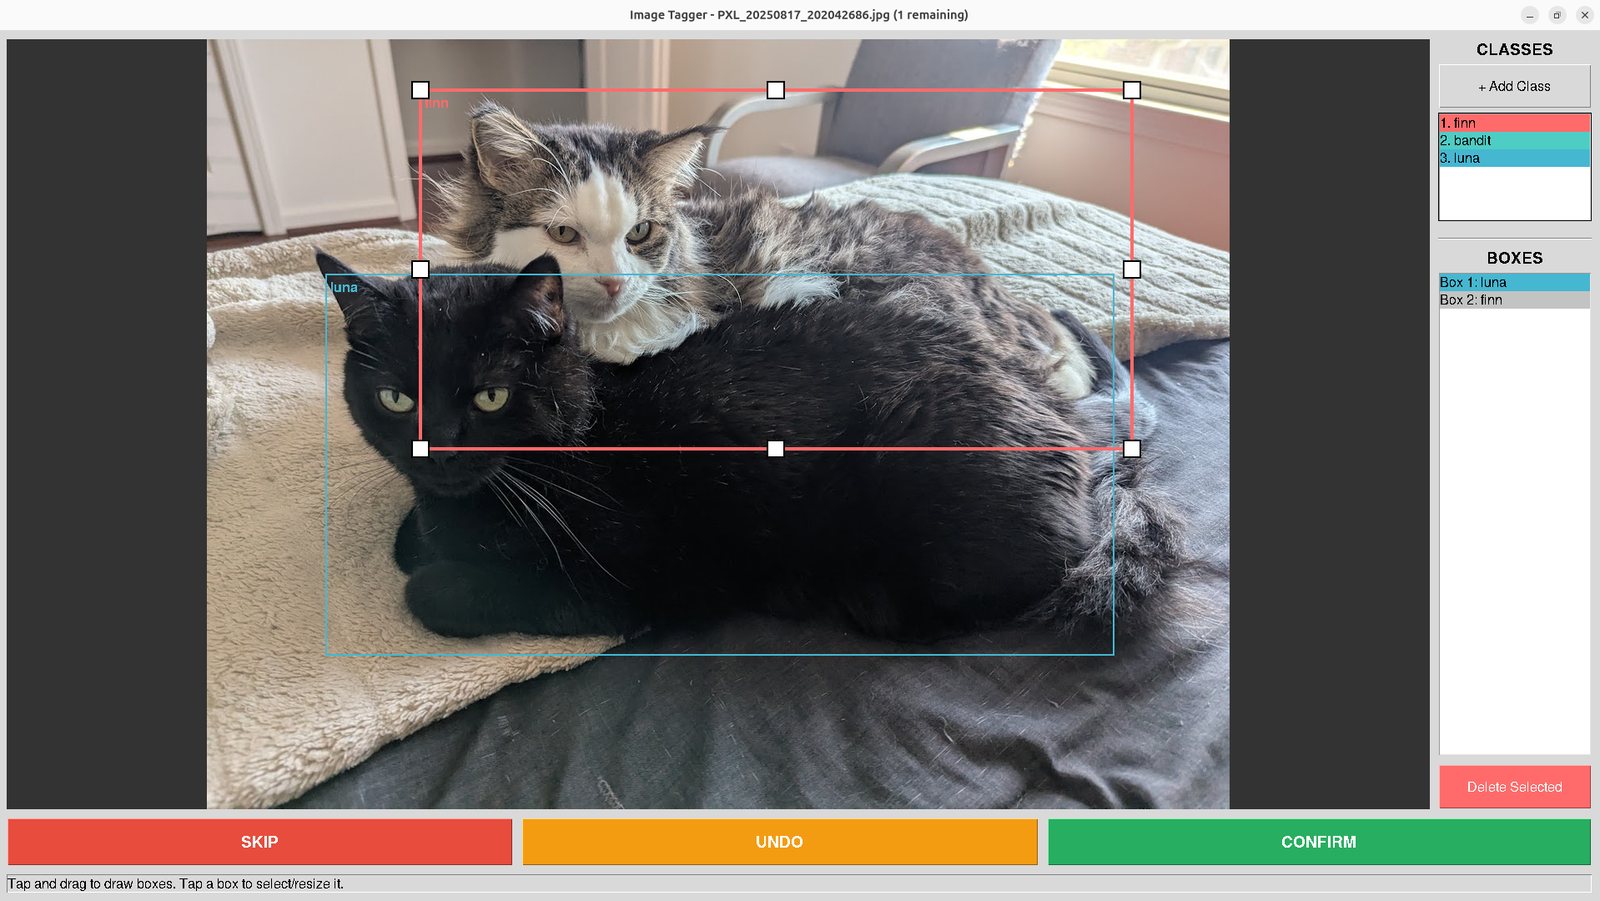
V1 worked. V2 arose as I worked with the tool, noting every bit of hesitation I had with the interaction. I added undo/redo with a 50-action stack and a panel listing every box and its assigned class.
From Cats to Documents
For training images that just need a class label (like the original document classification problem), it’s still the same tool pattern, but in a different domain. I made another while thinking about how the project would work for documents. I in fact did this in the initial pass for the Puss in Boots detection, though at that scale, I started needing to be judicious about class balancing in the later rounds.
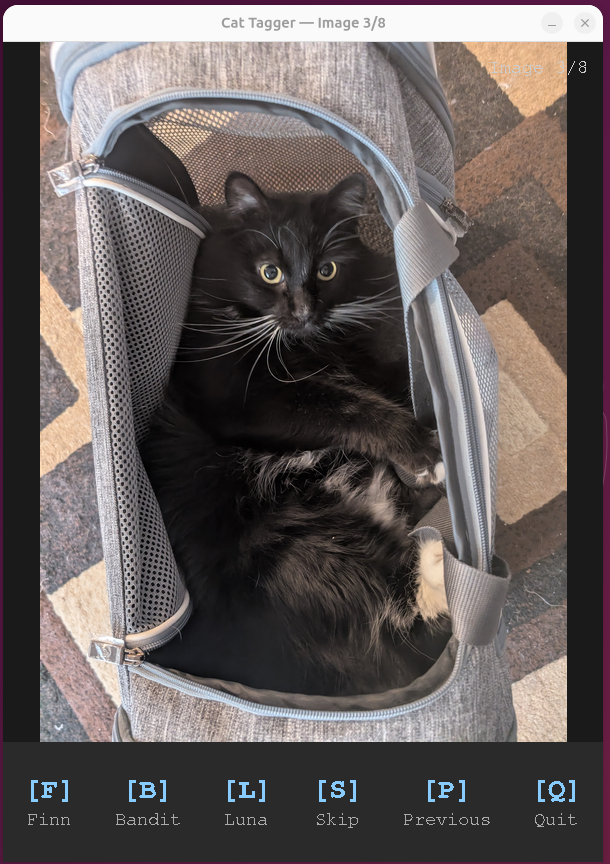
For single image detection, keyboard tagging makes way more sense. I made a tool with Tkinter where it goes through the folder and displays it. You type F for Finn, B for Bandit, L for Luna. Same idea for documents: C for contract, I for invoice, R for receipt, S for skip. Image comes up, I press one key, next image loads. Peak throughput was about 1.5 seconds per page.
I’ve used the same pattern for document classification pipelines.
What’s the point?
I built these for myself not because that off-the-shelf tools can’t do classification. It’s that I can quickly and scrappily build something that identically matches how I’m already conceptualizing the process. Every shortcut, undo, go back, skip, exists because I hit that exact friction point while annotating. I add the stuff that makes it easy for me to do something extremely quickly, because the tool is just automating the way I’m already thinking about it. No translation costs accumulating.
I don’t have to constantly think “okay, click, move the mouse to a point I wasn’t thinking about.” There’s no translation step between the decision in my head and the action the tool takes. That matters more than it sounds like it should. Ruts aren’t always a bad thing. Scale is easy to achieve if you’re working in them.
A process that changes something, but closely enough to match the muscle memory of someone performing the task gets adopted. One that asks them to rethink their mental model on every interaction, doesn’t.
End Result
The tradeoff has always been between simple tools that work for most users (think things like coreutils in linux), more specialized powerful tools that work for an individual user (this post), and general purpose tools that work for everyone. The second two choices are becoming less of a distinction. Tkinter isn’t complex. It’s something that can be automated. Simple tools with reasoning and input a user can be glued together to make unreasonably powerful tools when paired with that user. The gap between “I need this tool” and “I have this tool” was two hours of tkinter and basic installs. That gap is getting smaller.
Google’s been exploring an idea like this with Generative UI, where Gemini builds bespoke interfaces on the fly instead of showing everyone the same one. It’s the same process at a larger scale, since the question is built on “I need this output, but I want you to understand how it would be most straightforward for me to do it.”
Ultimately, the tools I built here aren’t polished. They’re precisely fit. They’re held together with tkinter and duct tape, but that’s the point, built on the fly to match the shape of how I already think about the problem, so there’s no tax on every interaction. And that’s the real lesson here. The next generation of tooling isn’t going to be about building one perfect interface. It’ll be about making it trivially cheap to build the right interface for the person sitting in front of it.
Leave a Reply